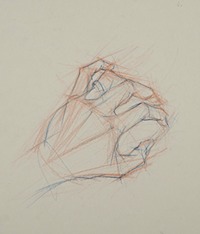
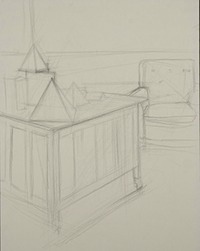
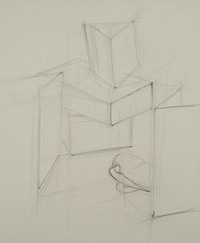
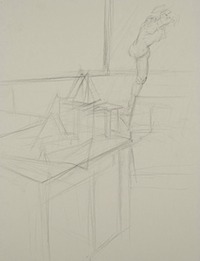
Sketchbook Week 2: Intuitive Gesture and the Perceptual Grid
Six Drawings
Subject: Still Life
Materials: 9"x11 3/4" Strathmore 400 paper and 2H, HB, 3B graphite pencils, View Catcher. NO ERASERS!
Continue working with the concept of translating the three dimensional objects on the two dimensional surface of the drawing paper through the process of sighting angle relationships between objects and parts within the same object. Remember to think of emphasis of parts for clarity of organization. If all of the marks look the same, the forms will look flat; if there is too much contrast, you will likely have confusion. Your job is to translate and organize to the best of your ability.
Let the pencils do the work that they are intended for; for example, a 2H pencil is meant to make a light gray mark and not a dark gray. Using more pressure will increase value, but the harder pencils will also damage your paper surface with too much of that. Number your drawings on the back of each sheet.
Drawing #1
1) Select 3-5 objects and arrange them into an interesting grouping based on shape, texture, scale, etc. Trust your first response as to what looks interesting; you will have the opportunity to change the arrangement in the next drawings. Use your View Catcher to help you with this process.
2) Use a 2H pencil and hold it in the open fashion demonstrated in class. Keep your eyes focused on the arrangement and begin moving your pencil above the paper in response to the directional forces of the objects in relation to one another as you see them from your point of view; do not make marks on your paper during this process! Following that process for about 5-10 seconds.
3) Observe where you want to start on the paper, which could be any section of the arrangement. Look down at your paper and place the pencil where you will be starting and then move your eyes back to the subject. Keeping your eyes focused on the subject, begin moving the side of the pencil lead in response to the directional forces that you see; don't worry if your pencil goes off of the page, as you can get back onto the "road". Keep your marks light. NO ERASING! 2 minutes.
4) Follow that first stage of the explorative process by using your HB pencil and begin to sight angle relationships regarding position and scale with the objects to one another and smaller parts of the individual objects. You are to leave those explorative marks on the paper, so keep you approach light in touch; you will still end up with a darker gray mark with comparable pressure used with the 2H pencil. Continue using your pencil held in an open manner; avoid the "writing hold". Relate internal components with the external edges of the objects. Avoid outlines! Use emphasis in areas; you can begin selecting where to go darker by emphasizing shadowed edges more, but don't feel restricted in approach; you may add additional dark accents where you feel they are needed for clarification or emphasis. 5 minutes.
5) Finish the process by using a 3B pencil in the open manner again and continue to define the internal and external edges of the objects that are more shadowed with it; avoid outlining all of the exterior edges of your forms! Choosing that approach will most often lead to a significant flattening of your forms. Observe how the value changes help to move you through the drawing: make a notation on the back of the paper about the character of energy that the drawing conveys. Approximately 4 minutes.
Drawing #2
1) Follow the same steps as in Drawing 1, approaching the arrangement from a different angle of view. 10-12 minutes.
Drawing #3
1) Rearrange the objects and follow the same steps as in Drawing 1 and 2. 10-12 minutes.
Drawing #4
1) Begin with the arrangement used in Drawing 3, but you can crop in closer, take a different point of view, or place the objects differently on the paper.
2) Follow steps 2-3 in Drawings 1-3. Pause after completing. 2 minutes.
3) Pause after completing step 3; observe the proportional relationships of the objects to each other. Use sighting of angle relationships to see how close you are. Are there any changes that are needed? Remember, NO ERASING; make those notations with your 2H pencil. 5 minutes.
4) Proceed with step 4 as you did in Drawings 1-3, using the HB pencil, but give yourself more time. 10 minutes
5) Complete the same process as in step 5 of the Drawings 1-3. 5 minutes.
6) Take a short break to look at the drawing; feel the energy of the shapes and marks of the drawing as you have put them together on the picture plane. 2 minutes.
7) Complete the drawing by making additions that help to both define the forms more clearly, as well as organizing the composition; composition is defined as the relationships of marks, character of shapes, textures, etc. and placement of them on a two dimensional picture plane. 6 minutes.
Drawing #5
1) Rearrange the objects and follow the same steps as in Drawing 4. Approximately 30 minutes.
Drawing #6
1) Take a different point of view of the still life arrangement and follow the same steps as in Drawings 4-5. Approximately 30 minutes.
Select one of Drawings1-3 that you feel best demonstrates your understanding of the process and place an asterisk on the back of the sheet next to your original notations. Do the same with Drawings 4-6.


